Bluehost Web Hosting Help
Navigating the File Manager
This article is part of our File Manager tutorial series. Please see the links below if you are looking for a different explanation of the File Manager.
- Accessing the File Manager
- Navigating the File Manager
- Uploading Files
- Creating, Removing, and Editing Files
- Copying and Moving Files
- Compressing Files into an Archive (GZip)
- Extracting Files from an Archive

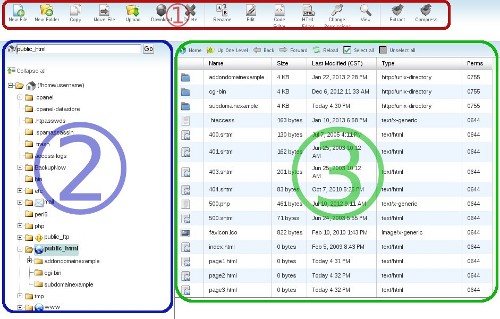
If you are not sure how to find the File Manager, please reference the Accessing the File Manager article. Once you are in the File Manager, you will need to know the different parts of the File Manager and how to navigate it. We have separated the File Manager into three sections: the Toolbar, the Directory Listing, and the File Listing.
The sections of the the File Manager are as followed:
- Section 1 (Red)- This top bar is the Toolbar. You will find all of the basic functions for managing files here.

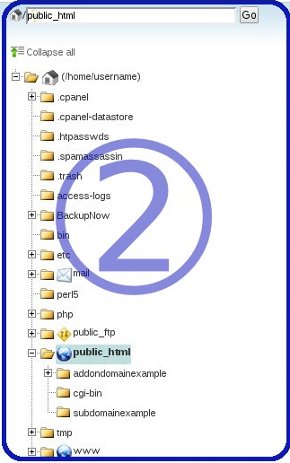
- Section 2 (Blue) - This left section is the Directory Listing. Here you will find a listing of all the directories (folders) present on your account. Below you will find a list of actions you can perform in this section.

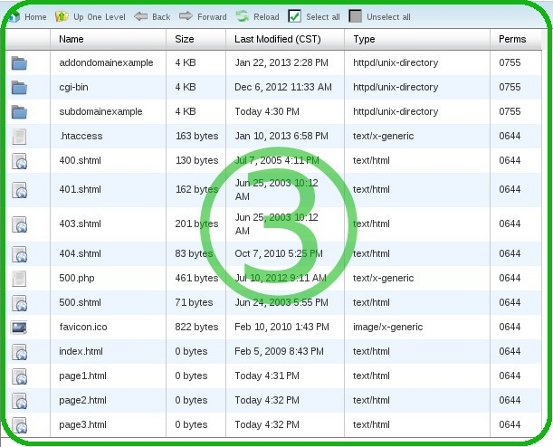
- Section 3 (Green) - This right section is the File Listing. Here you will find a listing of all the files of whichever folder is currently selected. Below you will find a list of actions you can perform in this section.

To Enter a Folder:
- Double click the blue folder icon in the File Listing.
- Alternatively, click on the yellow folder icon in the Directory Listing.
Either way will display the contents of that folder in the File Listing.
To Leave a Folder:
- At the top of the File Listing section, click the Up One Level link, and you will be placed in the preceding or parent folder of the one you are currently in.
- Alternatively, click on the appropriate folder you want to switch to from the Directory Listing.
Recommended Help Content
File Manager - How to Extract Files from an Archive
This article will walk you through extracting compressed files using the File Manager.
File Manager - How to Copy and Move Files
This article will walk you through copying and moving files using the File Manager.
File Manager - How to Create, Remove, and Edit Files
This article will walk you through creating, removing, and editing files with the file manager.
Related Help Content
File Manager - How to Upload Files
This article will walk you through uploading files using the File Manager
Accessing the File Manager
This article will give a basic overview of the File Manager and explain how to access it.
File Manager - How to Compress Files into an Archive GZip
This article will explain how to utilize GZip through the file manager.
IP Deny Manager Tool
This article will explain how to utilize the IP Deny Manager tool in cPanel.
Process Manager Overview
What is the Process Manager? How do I use the Process Manager? Why can I get to my cPanel but homepage does not display?
Intro to FTP
There are many ways that you can transfer files and folder to and from your hosting account. We highly recommend using an FTP (File Transfer Protocol) program to quickly upload and download files. We
How To Edit Website Files With The File Manager - File Manager Guide
I am trying to edit my web page and I have no idea how to? I need to know how to go into the site and fix it. My webpage has a error in the first paragraph. I don't know how to fix it? Can you help?
Setting file and user permissions
Short tutorial on how to set file and user Permissions in cPanel.


 218,691 views
 bookmark
 share
share
 E-mail
 Twitter
 Google Bookmarks
 Facebook
 MySpace
 Digg
Digg Reddit
 Delicious
 LinkedIn
 StumbleUpon
 tags:
tags: