Bluehost Web Hosting Help
FTP Setup on Dreamweaver CC 2014
Summary
This article will explain how to publish a website using Adobe Dreamweaver CC 2014.
Adding the FTP Server
- Go to the Site menu and click on New Site.
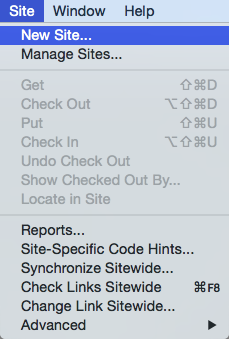
The Site menu with New Site selected. - On the Site Setup page enter a name for this site. Then choose a folder for storing your site on your computer.
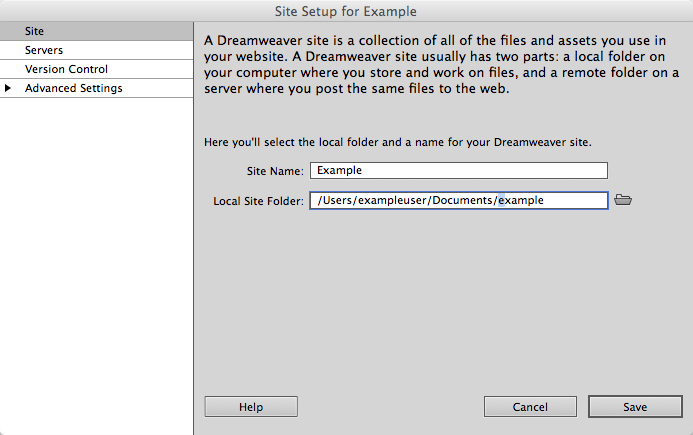
The Site Setup page with example data. - Click Servers on the right side of the setup window.
- On the Servers page click the plus symbol or + to add a new server.
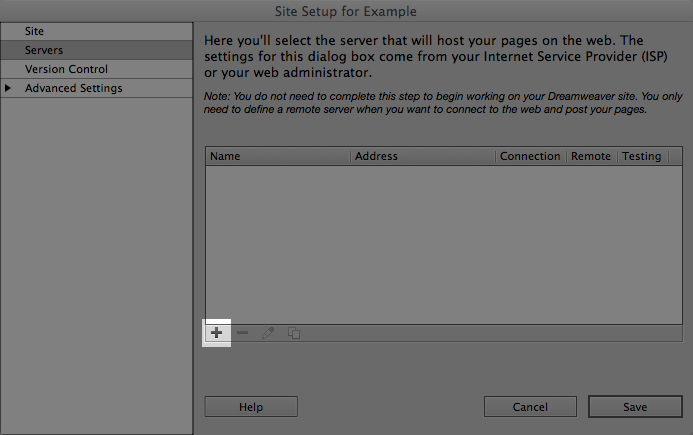
The servers page with the add server button highlighted. -
On the new server page fill out the FTP server settings.
- Server name is any name you would like to give this server.
- The "Connect Using" setting should be set to FTP
- The FTP Address is normally your domain with "ftp." added in front. If my domain was example.com I would use ftp.example.com
- Username should be your hosting account username.
- Passsword should be you hosting account password.
- The Root Directory is normally public_html if your site is hosted out of another folder use that folder.
- Web URL should be just the URL you access the site from.
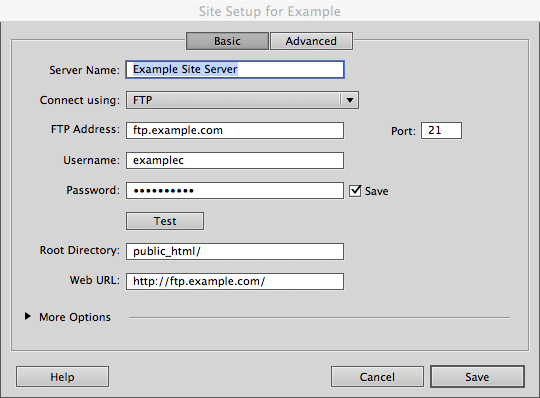
The servers settings window. - Click the test button to make sure the settings work and make any corrections if needed.
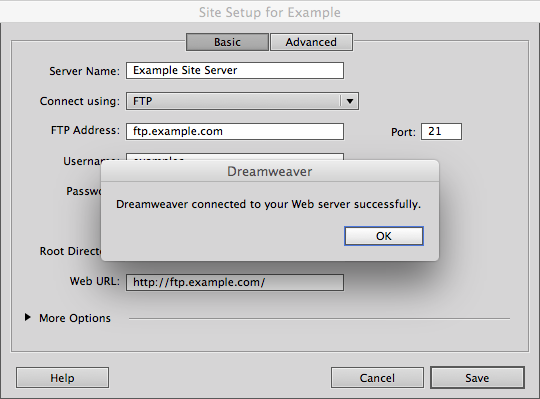
A succesful settings test. - Click Save.
- You should see the server in the list of servers for the site now. Click Save.
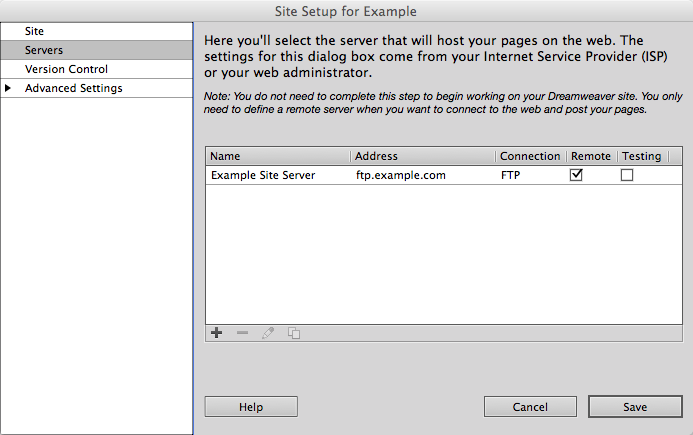
The servers list with the new server.
Publishing The Files
After you have followed the steps for Adding the FTP Server its simple to publish the site.
- Go To the Site menu and click on Put.
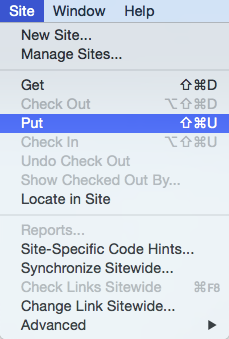
The site menu with Put selected. - Click yes if it asks you to publish dependent files.
Thats It! You will see a progress box indicating it is publishing your files. When finished it will go away automatically.
Recommended Help Content
FTP Setup using Dreamweaver MX
How do I connect and upload via FTP with Dreamweaver MX?
FTP Setup using Dreamweaver MX 2004
How do I connect and upload via FTP with Dreamweaver MX 2004?
How To Setup Dreamweaver CS5
Connecting and uploading via FTP with Dreamweaver CS5
Related Help Content
FTP Setup and Publish with Web Easy Pro
What are the publish settings for Web Easy Professional ?
FTP Setup Using Dreamweaver 8
How do I setup Dreamweaver 8 for FTP?
How To Setup FTP Using Filezilla
I would like to use FileZilla how do I go about the setting it up and connecting to my site?
Publishing with DreamWeaver CS5
Learn how to publish the website you have created with Adobe Dreamweaver CS5
FTP - Uploading the website
How do I upload my web site?
How To Create and Edit An FTP Account
How to use use the FTP Account tool to create additional FTP Accounts. This is useful for granting FTP access to your account without giving anyone your cPanel password.
Publish Using MS Publisher
How do I publish my Web site using Publisher?
Website Pre-Publish Checklist
You have invested a significant amount of time creating and perfecting your website, and you're ready to publish it for the world to see! Are you really though? Use this checklist to ensure your site is ready for publication.


 185,830 views
 bookmark
 share
share
 E-mail
 Twitter
 Google Bookmarks
 Facebook
 MySpace
 Digg
Digg Reddit
 Delicious
 LinkedIn
 StumbleUpon
 tags:
tags: